As we all know, beer was safer to drink during colonial times than water was. And it was a major dietary staple from the cradle to the grave. Infants were fed it, and it was recommended to breast feeding mothers. In the formative colonial years, beer was brewed at home and most households built a brewroom on the side of their house. Hops grew wild in the forests around the towns, which was a huge plus for these homebrewers. As currency was established in the colonies and trade was possible with England, taverns began to pop up. Taverns were not just a place to get a drink, but to socialize and hold meetings. The tavern actually became one of the most important meeting places a town could have. And, many of the constitutional ideas were formed in taverns. (As we know, Thomas Jefferson wrote the first draft of the Declaration of Independence. But did you know that he wrote it while drinking Madeira at his usual table in the Indian Queen Tavern in Philadelphia?)
But how do we really know that the founding fathers as a group drank a lot? Well, believe it or not, there are records of their shenanigans. In 1787, two days before they signed the Constitution, the 55 delegates to the convention went to a local tavern. According to the bill, they drank 54 bottles of Madeira, 60 bottles of claret, 8 whiskeys, 22 porters, eight hard ciders, 12 bottles of beer and 7 bowls of alcoholic punch. They did have a reason to celebrate!! And keep in mind, that may seem like a lot, but the average American at the time drank many more the times as Americans of today do. Getting drunk, but not losing control, was much more acceptable than it is today.
So there you have it! As we celebrate our nation, don't forget to drink a beer ... it's a tradition!
(Handbrewed Soaps is NOT endorsing getting drunk, just to celebrate... responsibly!)
I love the Fourth of July! Every year, our family goes to the Alameda Parade and watches the bands and community groups walk by. I'm the "embarrassing" one in the family as I am always hootin' and hollerin' with each group that goes by. I find it interesting that I'm only one of the few that does that, but that's another story. After that, we usually go party hopping and find a good place to watch the fireworks in the evening. This can be a hard task since often enough, the fog rolls in and seeing the firework display in any of the cities in the Bay Area is close to impossible. That's our tradition, and I now you have yours! If your tradition is to host a Fourth of July Party/ BBQ and are looking for a beer theme, well you've come to the right place. Here is a collection of ideas that may inspire you!
Have a Safe Fourth of July. Please let us know of any DIY beer themes you come up with, we would love to hear about them! Cheers!
Recently I got advice from multiple people that I should go back to teaching elementary school. They made very valid, practical, and 'safe' points about retirement, benefits, and a steady income that teaching would give me and my family.
I have been strategically planning on leaving the teaching career over the past four years. I went from 100% employment, to 80%, to 50%, to finally 20%. When I wasn't teaching, I was starting my soap company. Now, I'm at the crossroads that I have been anticipating, running my soap company full time, and what do I do, doubt myself and ask others what I should do. And with this advice, I realize that my fear of the unstable is what has stopped me from starting my business! Yes, I'm scared shitless of a lack of a steady pay check and all the other things mentioned by those that are concerned about my choice. But what they (and I) have failed to see is that I've been planning this for four years!! As Connor Franta says in his memoir, A Work in Process, (yes I am quoting a 22 year old YouTube star):
"In a world conditioned to follow the herd, mentality, playing it safe, a lot of people find it hard to stay true to themselves and accept the things particular to them. It's easy to give in to peer pressure and simply settle with what everyone else is doing, but never forget that each of us is different. You are your own individual, with your own particular set of dreams,desires, and aspirations...So know what you like, know what makes you happy, stick to your guns, and state it with confidence. You'll walk taller, and as long as you follow your gut, you won't stray far in life."
So here I am, following my gut! I'm looking forward to this new chapter! What new chapter are you starting? How do you work through the doubt?
About six years ago, we jumped on the urban farmer movement that was sweeping the Bay Area. We went on Urban Farm tours through out Oakland and Berkeley. We (shall I say I) because obsessed with the works and teaching of Novella Carpenter, a woman who turned a vacant lot next to her West Oakland Apartment into a farm, complete with turkeys, chickens, and rabbits. To me, she was a revolutionary... doing something that Oakland really need at the time, to invest in FRESH FOOD in communities where there was a grocery store wasteland. (There are parts of Oakland that do not have a grocery store within a 5 mile radius, but only convientient stores. Many peoples menu choices are Cheetos, Soda, and Hungry Man's Frozen Dinners.) One day, while driving on the freeway a couple of weeks after I finished Carpenter's Book GHOST TOWN FARM, I was very aware of the farming way of life. Eric and I noticed a Toyota Truck that had hay flying out of it (this is a sight you NEVER see in the Bay Area.) Of course I made Eric catch up to car wondering who/what farmer was in the middle of the city, and it turned out to be Novella Carpenter! I had a heart attack at that moment and quickly found a piece of paper which I wrote: I LOVE YOUR BOOK THANK YOU FOR BEING YOU!!! As we drove past her, I held this sign to the window. I'm proud to say she saw it. She gave me a thumbs ups and a huge grin! It was a sign, we were going to create our own farm!!! And ultimately, we would become happier, calmer people.
Plum Wine In The Making
And for the next four years, we had an 1/8 acre "farm" in our backyard completely with a plum tree, apple tree, fig tree and four chickens named Puffy, Cinderella, Bramha, and Lady. We grew Quinoa, Zucchini, Fava Beans, tomatoes, lettuce, and even our own Omega- 3 rich chicken food. I made homemade apple sauce, pies, plum jam, and plum wine. I even started experimenting with making cold processes soap (yes I am self taught!), laundry soap, and Eric started brewing beer. And don't forget, both Eric and I were both full time teachers as well. We learned a lot about farming and ourselves. Here are the top 5 things we learned about have our own 'farm.'
1) Don't Believe Everything You Read: One of the biggest reason this city slicker started an urban farm was because everything I read (books, blogs, how-to's) painted a picture that by having a farm, and living sustainably would simplify my life and the life of the community around me. I would let go of my worries, find inner peace, and heal a community problem of lack of fresh food in our community. Was I a little nieve? HELL YES I was... Maybe on Saturday morning I found peace, but that was probably because I wasn't around 30 kids.
2) Running a Family Farm is Hard Work: Don't get me wrong, gardening, cooking, and collecting eggs where very much a stress reliever, but not so much around report card time. There was a lot to do. We had to get up in the morning and water everything and collect eggs. And don't get me started about chickens...there was chicken shit EVERYwhere. They dug up my artichoke plants (which at that point... if the neighborhood skunks got them for dinner... good for the skunks!) I had so much zucchini, and lettuce that I couldn't give it away fast enough (we left boxes of fresh food for people to take!) Processing Quinoa to get toxins out of it is no joke.... it took ALL DAY just to clean one cup of the stuff. But the pies were good and plum wine would knock your socks off, I can't complain about that!
3) Giving Up is Not the Same as Knowing Your Limits: This experience led me to a new found appreciation for the farmers of the world, their hard work, and their commitment to bringing people food. As the years went on in our little farm, the more responsibility it took on. Eric and I were at the point, where it was becoming a full time job and needed to reconsider how we were going to keep up with all of this. Both of us have dreamed of a lifestyle such as this. We talked (and still do) about owning 50 acres, but this experience taught us that right now, at this point in our lives, we were not ready for it. To keep our sanity, we needed to scale back. We needed to get rid of those elements that were overwhelming and keep doing the things that only brought us joy! So, we found a nice home for our chickens in the next city over. We believed growing our own food is still a priority, but we only grew enough for the family. And I made cold processed soap a priority (how I went from classroom teacher to running my own soap business is a whole other story!), and Eric kept up with brewing beer on a regular basis. Most importantly, we had faith that one day we would have our 50 acres.
Yes, one day... What experience have you created in you life that have shown you your limits?
You've heard me say it before, and I'll say it again... Beer is a wonder beverage. It's not just good to drink, it's good for your skin. Did you know though, that beer can be used around the house? These three unusual uses for beer, might come in handy for you one day. (Note: We have tried this, and it works for us... let us know if it works for you!)
1) Polishing Wood Furniture: Need your wood furniture to be shiny for your house guests? Polish that coffee table by pouring a little bit of flat, stale beer on a polishing cloth. Follow it up with a dry buff and the table will look like new.
2) Slug Remover: Don't use horrible chemicals to remove slugs from your garden! Instead, fill up a saucer with beer and leave it in our garden. The slugs will be attracted to the beer, get drunk off of it and then drown! Refill the saucer daily and soon you will be slug free!
3) Redirect Bees: Bees and wasps also love beer. So, the next time you have a BBQ, don't forget to give the bees and wasps some beer too! Put a small amount of beer in cups around the perimeter of your party. Most of the the bees and wasps with be attracted to these cups, leaving your guests free from shooing these pests away!! And remind your guests not to drink from these cups! YUCKKK!!!
There are a lot of fun things you can do with beer bottles once you've drank the beer. Today we are going to go over how to turn you beer bottle into a glass. We have been using Ken Supplies Bottle etcher. In our experience we found that this tool provided a less jagged lip, which means it won't cut you lip when drinking from it.
Step One: Use the etcher to score your beer glass. See Video here.
Step Two: Dip the bottle into boiling water for one to two minutes.
Step Three: Lifting the bottle straight up and down, plunge it in to ice cold water. Wait for it to break off.
Step Four: You may need to do Step Two and Three a couple of times.
Step Five: Look at the lip. If there are chips in it, you may need to sand it. We use the P80 sander.
Step Six: You will need to sand it with a machine and by hand.
When you are all done, rinse the glass out and feel free to use. You can also take it one step further by gluing the top of the bottle to the bottom. Then you get a beer goblet.
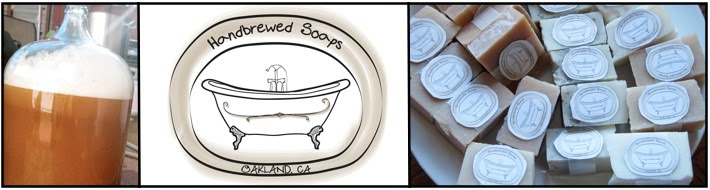
At Handbrewed Soaps, we believe that brewing beer and soap
are both a science and an art.Just like
a science experiment, you must follow some basic rules in order to produce the
desired outcome or product—in our case, beer and soap.And, as with art, individual interpretation,
experimentation, and improvisation are encouraged and expected.While many brewers
feel that they have found the “best way” to brew beer, there are so many
variables in the brewing process, that there’s a good chance that a homebrewer
in your own neighborhood is doing something radically different or just subtly
unique enough that you could apply to your own brewing process to make more
interesting or flavorful beers… and soaps!At Handbrewed Soaps, we have developed our own unique style of brewing
and soap-making by reading, researching, and hanging out with fellow
homebrewers and soapmakers.We hope that
you enjoy the methods, tips, and tricks that we use in our brewing and
soapmaking process!
If you are new to brewing beer or soap, and want to learn
more about the basics of either (or both!), we highly recommend How to Brew byJohn
Palmer and The Soapmaker’s Companion
by Susan Miller Cavitch.Of course there
are hundreds, if not thousands, of resources online to help you get started and
support you every step along the way. Below
is an overview of how Brew Master Eric Swihart brews the beer, and how Soap
Lady Alyson Swihart transforms the beer into soap.Don’t worry, we don’t use all of the beer to
make soap-- we drink a lot of it too!!!
Enjoy a tasty cold
beverage and Make Some Soap!
At this point (please refer to Part One in this series, Making Homebrewed Beer) we take the beer for our cold processed soap,
as we do not want it carbonated. Cold process soap is the act of mixing a few
oils (olive oil, coconut oil, and sustainable palm oil in our case) to an
alkali (Sodium Hydroxide: aka Lye). When
oils and sodium hydroxide are mixed together, it goes through a chemical
process called saponification ultimately creating what we know as a bar of
soap. Due to this chemical process, it
is important for the soap maker to take safety precautions (wearing gloves, eye
protection, and being in a well ventilated area). Through the chemical process, no lye remains
and a great bar of soap is made!
Preparing Lye Solution
Step One: Prepare
your Lye solution, which includes a liquid and sodium hydroxide. For our
liquid, we use our homebrewed beer (again making sure the carbonation is
completely out of it or it will volcano.) The ratio of liquid to Sodium
Hydroxide depends on your recipe. Always
remember to pour the Lye into the liquid, not the other way around! This solution will reach almost boiling point
so make sure to be careful with it! Wait
for it to cool to under 130 degrees, I prefer 110 degrees.
Step Two:Select your
oils and melt them! Once they are is a 10-degree range of your lye (that is
under 130 degrees,) start mixing your oils with a hand mixer and add your lye!
Mix, Mix, Mix
Step Three:Mix, Mix,
Mix!Once you’ve noticed the soap
thickening add any essential oils and exfoliants.You are going to keep mixing
until everything has ‘traced.’Trace is
when your soap has emulsified and looks like pudding.You can check for trace by pulling your hand
mixer out of your soap and if it leaves “trails” on top, it’s traced!
Pour into Molds
Step Four:Pour the
soap into your molds, and then cover with a towel to keep it warm.Your soap will continue to saponify.Leave in the molds for 24- 48 hour, after
which you can cut.But you will have to
wait another 4-6 weeks before using, as the soap needs to cure.During the curing process, excess moisture
evaporates from the bars, leaving a harder, longer-lasting soap!
At Handbrewed Soaps, we believe that brewing beer and soap
are both a science and an art.Just like
a science experiment, you must follow some basic rules in order to produce the
desired outcome or product—in our case, beer and soap.And, as with art, individual interpretation,
experimentation, and improvisation are encouraged and expected.While many brewers
feel that they have found the “best way” to brew beer, there are so many
variables in the brewing process, that there’s a good chance that a homebrewer
in your own neighborhood is doing something radically different or just subtly
unique enough that you could apply to your own brewing process to make more
interesting or flavorful beers… and soaps!At Handbrewed Soaps, we have developed our own unique style of brewing
and soap-making by reading, researching, and hanging out with fellow
homebrewers and soapmakers.We hope that
you enjoy the methods, tips, and tricks that we use in our brewing and
soapmaking process!
If you are new to brewing beer or soap, and want to learn
more about the basics of either (or both!), we highly recommend How to Brew byJohn
Palmer and The Soapmaker’s Companion
by Susan Miller Cavitch.Of course there
are hundreds, if not thousands, of resources online to help you get started and
support you every step along the way. Below
is an overview of how Brew Master Eric Swihart brews the beer, and how Soap
Lady Alyson Swihart transforms the beer into soap.Don’t worry, we don’t use all of the beer to
make soap-- we drink a lot of it too!!!
The VERY basics of
Homebrewing
We’re going to assume that you already have some basic
brewing supplies (boiling pots or kettles, buckets, fermentation vessels (glass
or plastic carboys), etc.).If not, head
down to your local homebrew store, and they will hook you up with everything
you need to get started.Likewise, we
assume you already have some basic soap making supplies including stainless steel
pots, hand mixer, and molds.Don’t go overboard.Start small and keep it manageable.It’s no fun to jump in over your head, only to get discouraged and
quit.Do what’s manageable for you right
now.Don’t jump in to all-grain brewing
until you have the time, equipment, and brewing experience to make the
jump.I brewed about 10 extract batches
before making the jump to all-grain.I’m
very glad I did, but if I had jumped in to all-grain brewing before getting
some experience with simple extract kits, I would have been very
overwhelmed.Have fun, start small, and
grow your homebrewing setup as your brewing skills advance.
Put together a recipe
What kind of beer should you brew?Brew the beer that you (and your friends)
like to drink.You’re going to be making
5 to 10 gallons of beer, and it would take one person a long time to drink that
much beer.So, make the kind of beer
that you—and your helpful/thirsty friends like to drink.At Handbrewed Soaps, our three most popular beers
(and soaps) are I.P.A., Oatmeal Stout, and Hefeweizen (American Wheat Beer, to be specific.)We decided to share our Orange Honey Wheat
Ale Recipe with you.We will first
explain the beer-making process, and then describe how Alyson transforms Eric’s
beer into soap.
Clean and sanitize!
Everything that comes in contact with your brewing
ingredients needs to be clean and sanitized.I personally recommend PBW (Powdered Brewery Wash), which is an
environmentally-friendly, biodegradeable alkali cleaner.After everything is clean, I sanitize it with
Star-San, an odorless, tasteless, food-grade sanitizer made from phosphoric
acid.I have never lost a beer to contamination
or infection, when I have used these two products to clean and sanitize my
equipment.Of all of the steps in the
brewing process, this is one of the most important.
Let’s make beer!
After everything has been clean and sanitized, you can and
should start making beer!In order to
make beer, you need four main ingredients: Water, Grain, Hops, and Yeast. Technically, any combination of grain can be
used to make beer, but the most common grain is malted barley, which serves as
the “base” for most beers.Additonal
grains (rye, oats, and wheat) and a supporting cast of specialty grains
(carmel/crystal, roasted, and dark malts) and adjuncts (honey, spices, herbs,
etc.) can be used to make some very tasty homebrew.Typically, the grain bill for wheat beers
(hefeweizens) is 30-70% wheat.The
grain bill for our orange honey wheat ale is going to be 40% wheat, with some
additional support from orange honey wheat and orange zest.
All-Grain Brewing
All of the beer we brew at Handbrewed Soaps (for drinking
and soap-making) is brewed on a three-tier, all-grain brewing setup built by
our friend and fellow homebrewer Jaston Hopkins, (aka Jaston of the
Woods).
Starch Conversion
The first part of all-grain brewing involves cracking or
“crushing” the grain you’ve selected.By
cracking the grain, two things are accomplished:1) you’re making the starch accessible for
conversion, and 2) the husk of the grain settles in the bottom of the mash tun
and acts as a filter to prevent grain from transferring into the boil
kettle.We are going to soak our grain
in hot water (at approximately 152° F) for about 60- 90 minutes. At this
temperature, enzymes in the grain start acting on the starch to convert it to
sugar (fermentable).This is a process
called saccharification.
Lautering and Sparging
Once the starches in the grain have been converted into
sugar, you need to separate the sugars from the grain.This is a process called lautering.Sprinkle 170° water over the top of the grain
to 1) stop the enzymes from converting starch and 2) wash the sugar off the
grain and into your boil kettle.The
process of sprinkling water over the grain to remove the sugar is called
sparging, which literally means “sprinkling.”The sugar water resulting from the mashing and lautering process is
called wort.(We have to go through a
few more steps before we have actual beer.)
Boiling
Once you’ve collected the wort in the boil kettle, and the wort
is boiling, add your hops at the times indicated on your recipe.Hops
added at the beginning of the boil are called bittering hops, because the
extended boiling time allows you to extract the highest amount of oils
(bittering qualities) from the hops.The
hops added during the middle part of the boil are for flavor, and the hops
added at the end of the boil are used to give the beer aroma.After 60 or 90 minutes, depending on your
recipe (and the style of beer you’re brewing), cool the wort with a wort
chiller.
*Wort is what we call beer before the yeast has eaten the
sugar and created alcohol.
Fermentation
1)Once wort reaches 75° (people have their own
preferences for higher and lower temps) transfer the wort to a sterilized carboy,
aerating it as much as possible in the process.Aerating the wort is helpful to ensure a vigorous, efficient, and
complete fermentation.
2)Leave 4” of headroom at the top of the carboy.During peak fermentation, the yeast will rise
(“krausen”) up to 4-6” above the liquid level in the carboy, and if you haven’t
allowed room for this to occur, prepare for a very messy result!
3)Put on
airlock or blowoff hoses, to allow for the yeast to “burp” off CO2 while
preventing external air from coming into contact with the beer
4)Put in a
cool dark place, and monitor frequently.When the “peak krausen” has dissipated and the airlock bubbles less than
once per minute, transfer the beer to secondary fermentation.
5)After 7-14
days, transfer the beer into keg or bottles, for carbonation.Beer can be carbonated in a keg in 2-3 days,
with forced CO2.Bottle-conditioned beer
takes approximately 2 weeks to become fully carbonated, by adding corn sugar to
the bottle prior to filling it with beer.
At this point, we take the beer to make the soap. See Part Two of our from Grains to Soap series to learn more!